
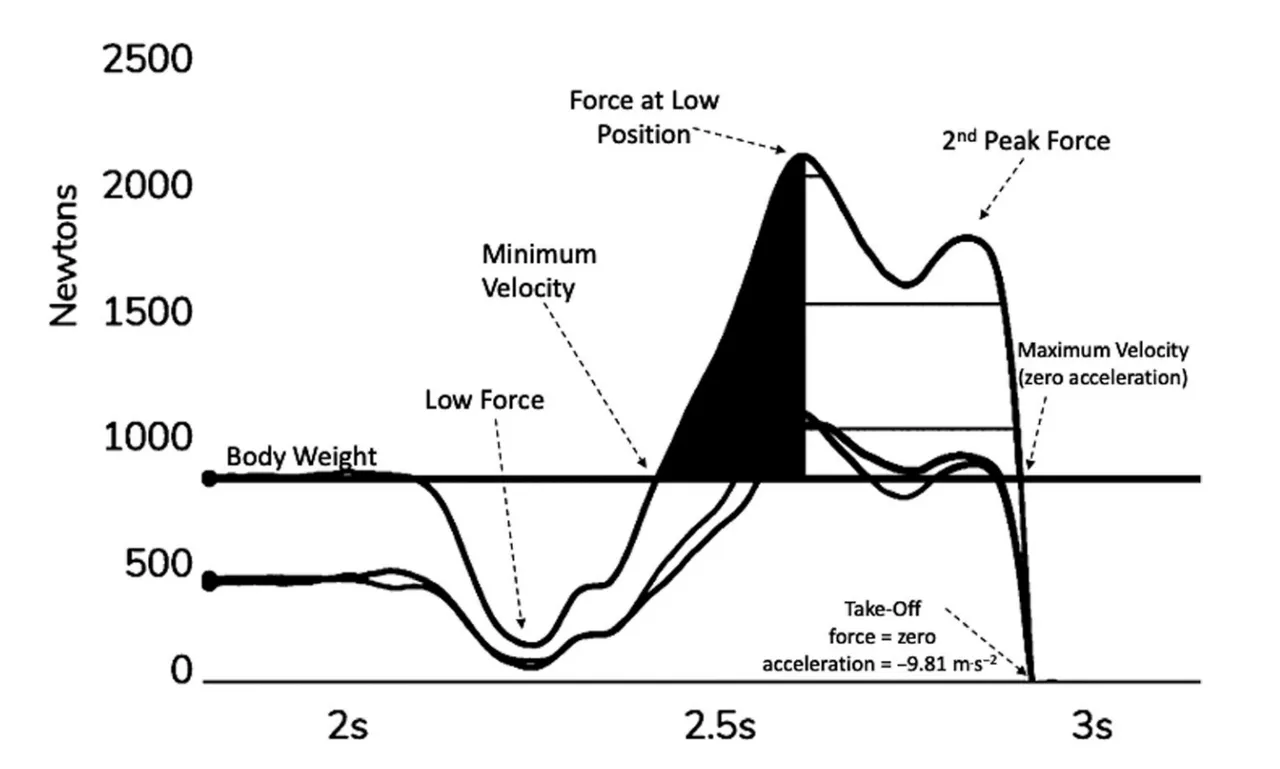
Vertical ground reaction force (GRF) profiles from countermovement jumps (CMJs) provide insights into the athlete's jump strategy.
Beyond jump height and RSI, the shape and timing of peak force tell a story about an athlete’s movement strategy.
Let's break down the 8 distinct force-time curve profiles observed in 100 elite collegiate athletes, as identified in the study by McHugh et al. (2020).
Understanding how the timing and shape of force profiles reveal jump strategy and efficiency
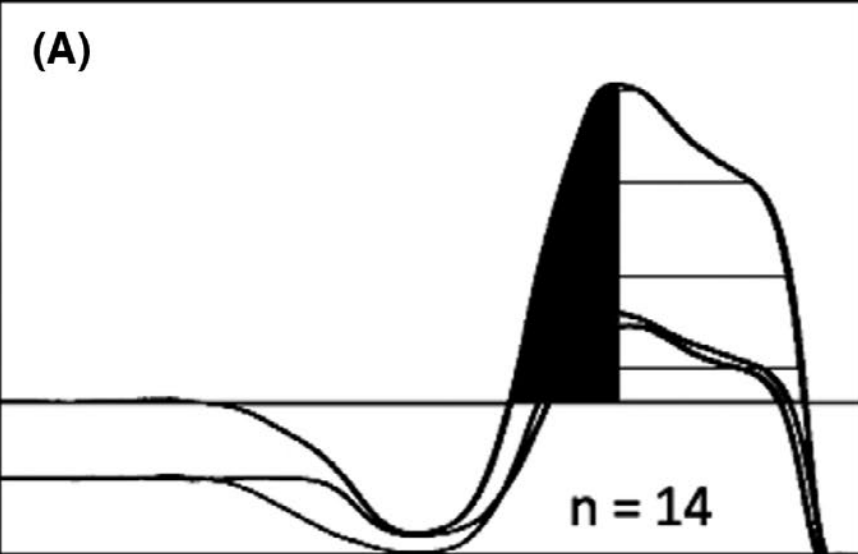
1. Unimodal – Peak Force at Low Position (n = 14)
The gold standard of jump efficiency.
- Single peak force aligns precisely with the lowest point of the countermovement.
- Indicates optimal timing for storing and utilizing elastic energy.
- Associated with higher RSI and better jump performance.
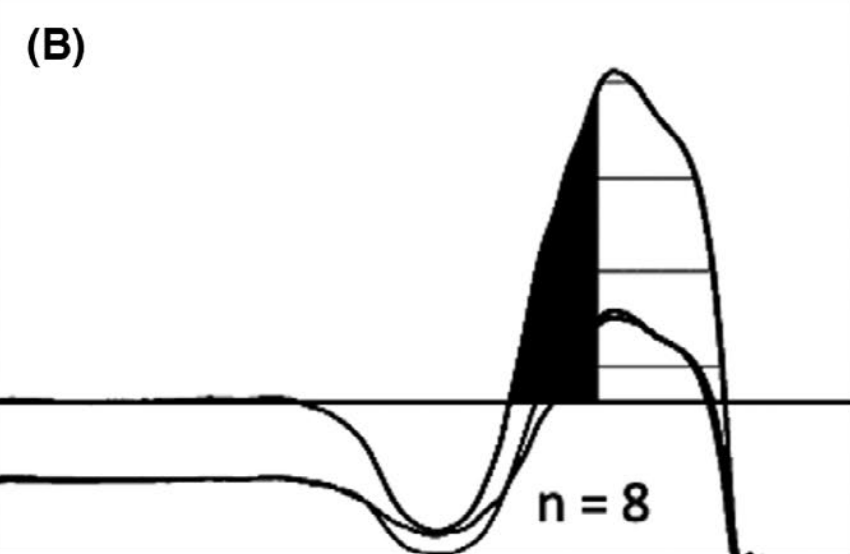
2. Unimodal – Peak Force After Low Position (n = 8)
Slight delay in peak force application.
- Peak force comes too late—during the concentric (propulsive) phase.
- Suggests potential loss of elastic energy efficiency.
- May reflect a more passive or delayed force production strategy.
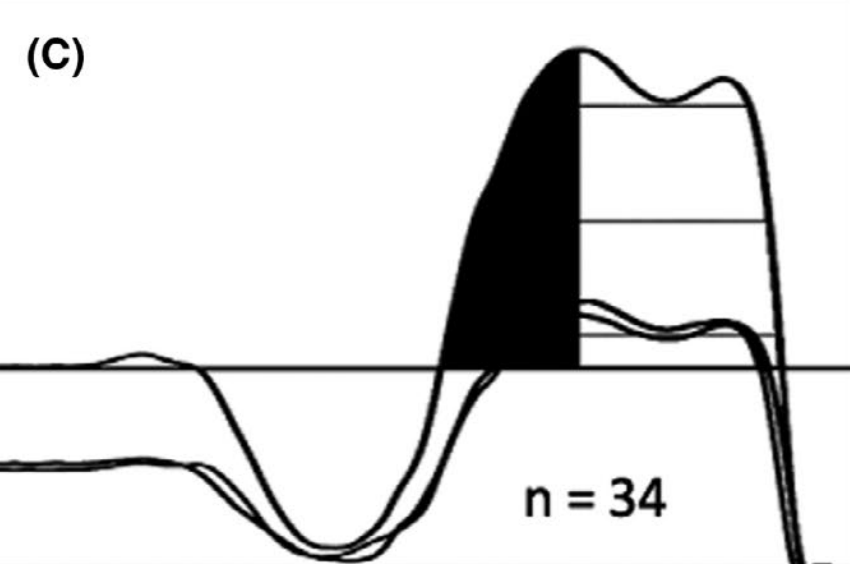
3. Bimodal – First Peak > Second Peak, Peak at Low Position (n = 34)
Efficient dual-peak strategy.
- Two peaks, with the first (and highest) aligning with the countermovement nadir.
- Efficient eccentric-concentric transition.
- Represents the most common efficient pattern in this cohort.
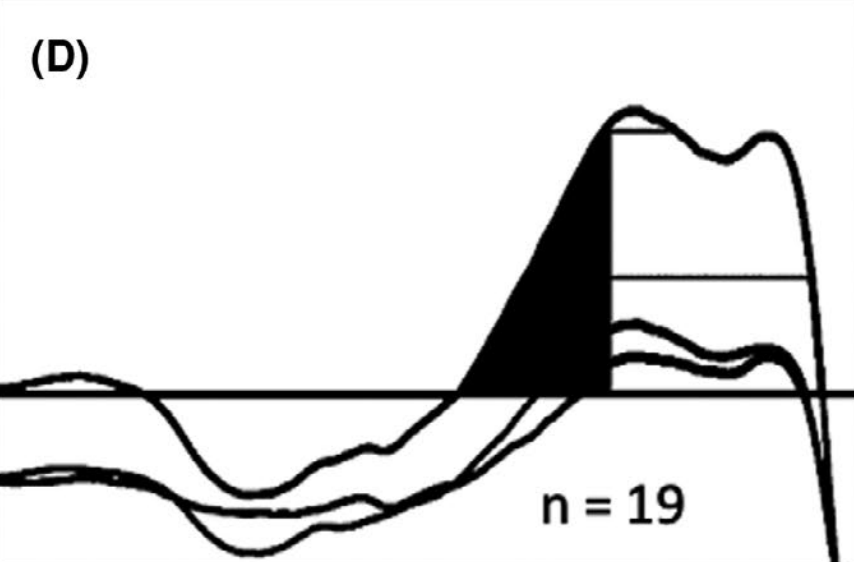
4. Bimodal – First Peak > Second Peak, Peak After Low Position (n = 19)
Delayed efficiency.
- Strong initial braking, but peak force comes after low point.
- Elastic potential may not be fully captured at the critical transition.
- Often still functional, but not as efficient as profile #3.
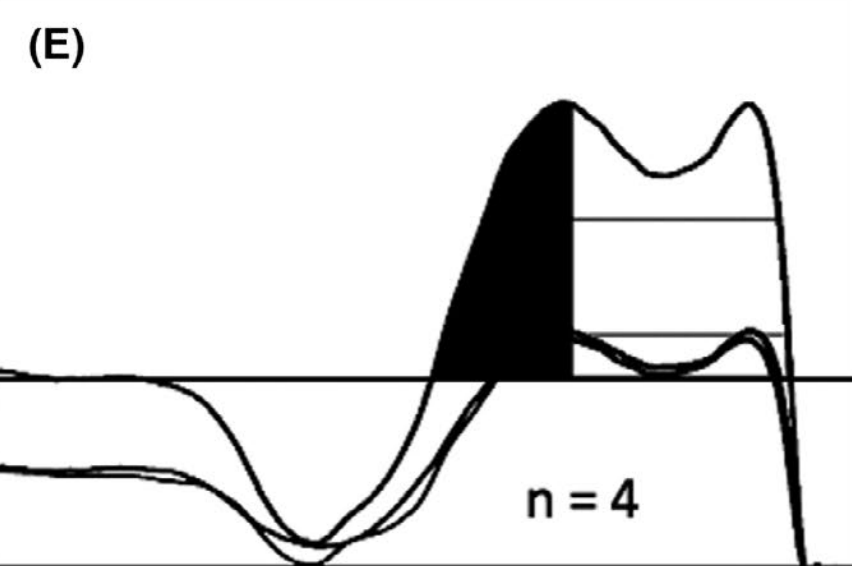
5. Bimodal – Equal Peaks, First at Low Position (n = 4)
Balanced but rare.
- Twin peaks of equal magnitude, with the first occurring at low position.
- May suggest a balanced or stable strategy.
- Efficient but less common.
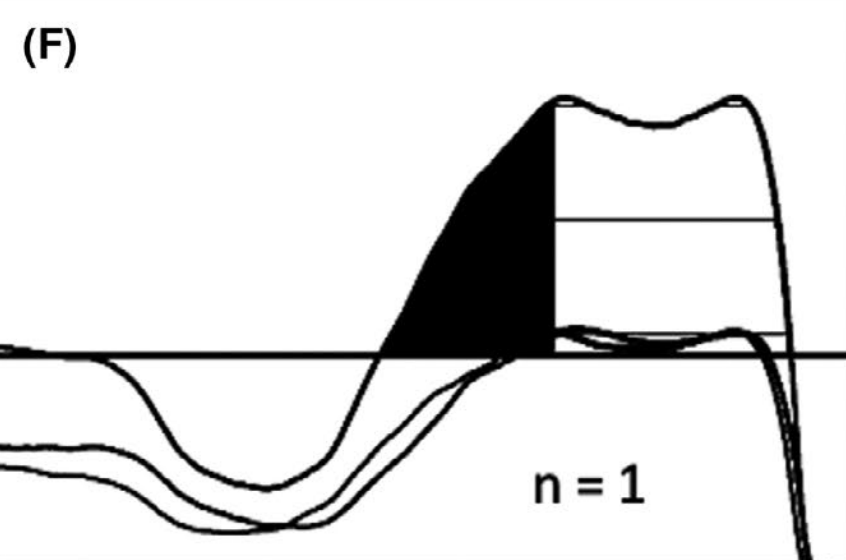
6. Bimodal – Equal Peaks, First After Low Position (n = 1)
Technically inefficient and very rare.
- Equal peaks, but first comes too late (after low point).
- Poor timing in force application.
- Only observed once in this study.
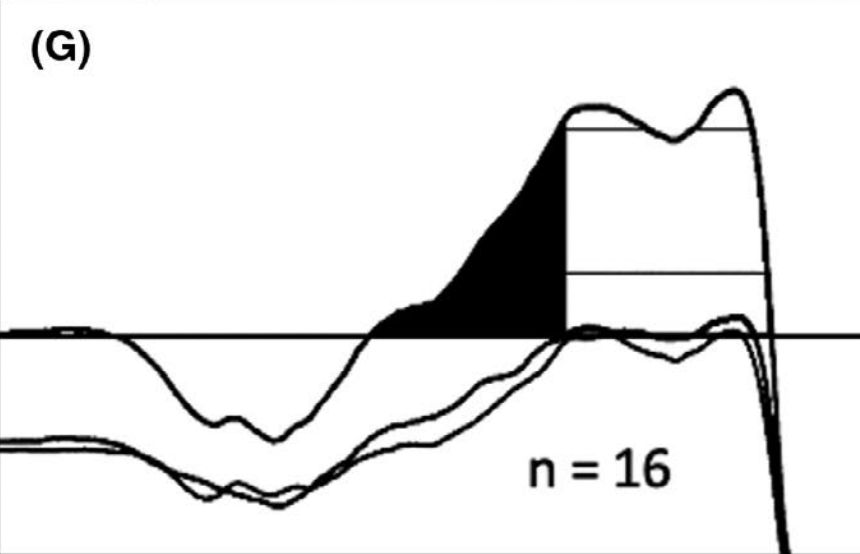
7. Bimodal – Second Peak > First Peak, Peak After Low Position (n = 16)
Inefficient concentric emphasis.
- Highest force occurs well into the concentric phase.
- Implies reactive strength or timing deficiencies.
- Associated with lower jump metrics.
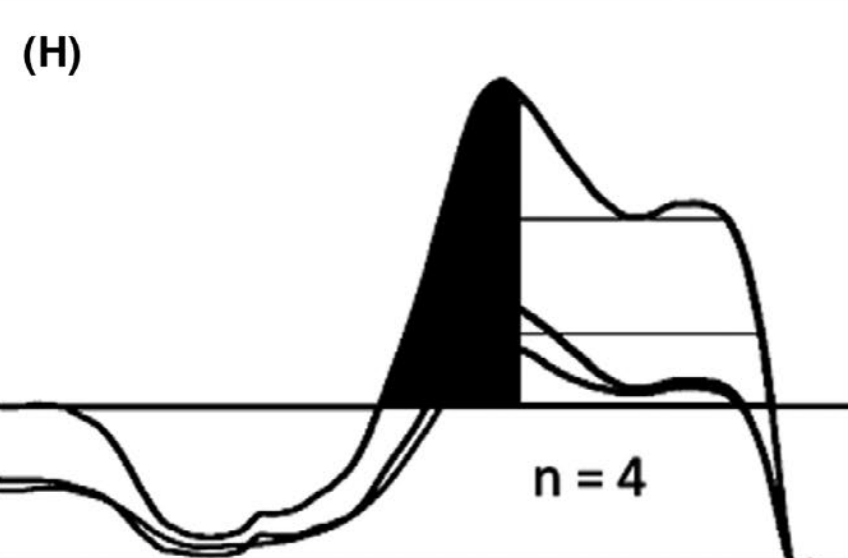
8. Bimodal – First Peak > Second Peak, Peak Before Low Position (n = 4)
Overbraking early.
- Peak force occurs before the bottom of the countermovement.
- Indicates excessive early braking and loss of efficiency.
- Least biomechanically ideal among the 8.
Coach's Takeaway
Not all jumps are created equal, even if the height is the same.
These 8 GRF profiles highlight how athletes can produce similar outputs through very different neuromuscular strategies.
For coaches using force plates, identifying when peak force occurs (relative to the bottom of the countermovement) is a simple yet powerful diagnostic.
Reference:
McHugh, M.P., Hickok, M., Cohen, J.A., Virgile, A., & Connolly, D.A.J. (2020). Is there a biomechanically efficient vertical ground reaction force profile for countermovement jumps? Translational Sports Medicine.


